
本稿ではTime4VPSでサーバの契約を行った後に、OSをインストールする方法を説明します。
Time4VPSで契約を行った後はOSをインストールしましょう。
Time4VPSではGUI操作でだれても簡単に複数の種類のOSから選んで自分のサーバにインストールすることが可能です。インストール可能なOSは、プランにもよりますが複数のディストリビューション、バージョンから選択可能で、例えば契約方法の紹介記事の例で紹介したVPS – XSのプランであれば以下のOSから選択することが可能です。
Webmin 1.8 (CentOS 6, PHP 5.5) (64-bit)
VestaCP 0.9 (CentOS 6, PHP 5.5) (64-bit)
ISPConfig 3 (Debian 8, PHP 5.6) (64-bit)
cPanel & WHM (64-bit)
Counter-Strike 1.6 (64-bit)
Filer (CentOS 6, Rsync, FTP, Samba) (64-bit)
Remote Desktop (CentOS 6, VNC) (64-bit)
ownCloud (CentOS 7) (64-bit)
CentOS 6 (64-bit)
CentOS 7 (64-bit)
Debian 7 (64-bit)
Debian 8 (64-bit)
Fedora 22 (64-bit)
Fedora 23 (64-bit)
Scientific Linux 6 (64-bit)
openSUSE 13.1 (64-bit)
openSUSE 13.2 (64-bit)
Ubuntu 12.04 (64-bit)
Ubuntu 14.04 (64-bit)
Ubuntu 15.04 (64-bit)
Ubuntu 16.04 (64-bit)
※2017/09/13時点のラインナップです。
手順も画面から選択するだけと非常に簡単です。早速、みていきましょう。
Time4VPSのプラン申込みは↓から

Time4VPSでOSのインストールを行う方法
Time4VPSにアカウント登録とサービス料金の支払いを終え、契約がアクティベーション(認証)されたら、OSのインストールを行っていきます。
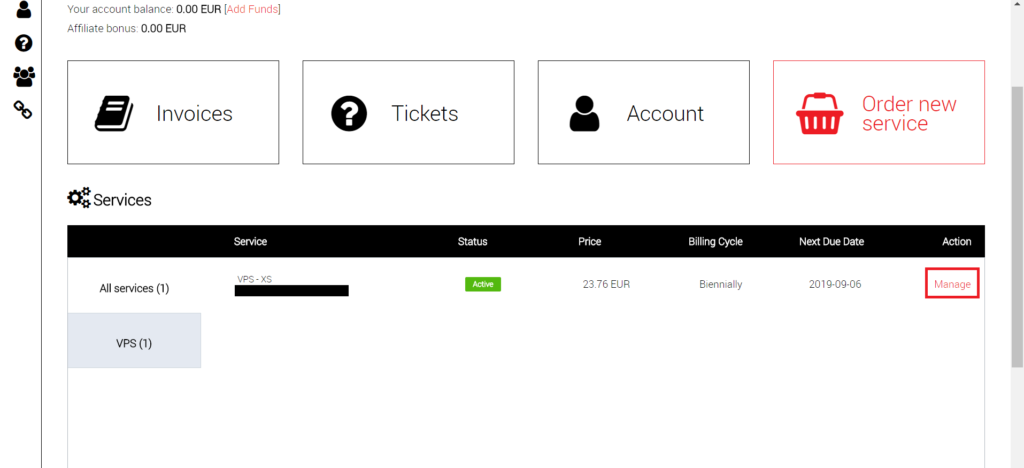
まずはTime4VPSにログインして、ダッシュボードからOSをインストールするサービスを選択します。
※Time4VPSでの最初の契約の場合、サービス料金の支払いを行ってもアクティベーションを行うまでOSのインストールが出来ません。アクティベーションが未済の場合は、こちらの記事を参考にまずはアクティベーションを行いましょう。
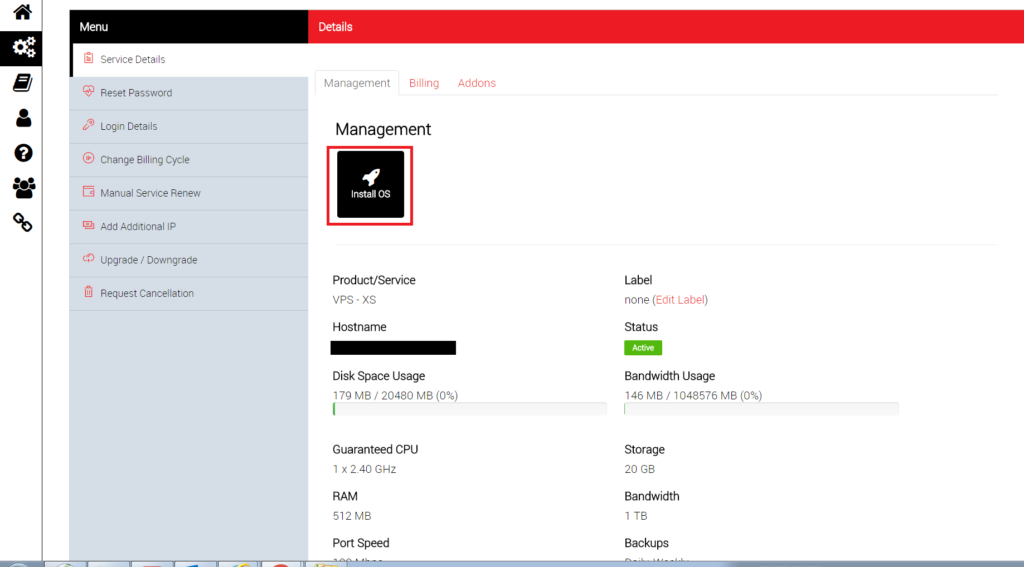
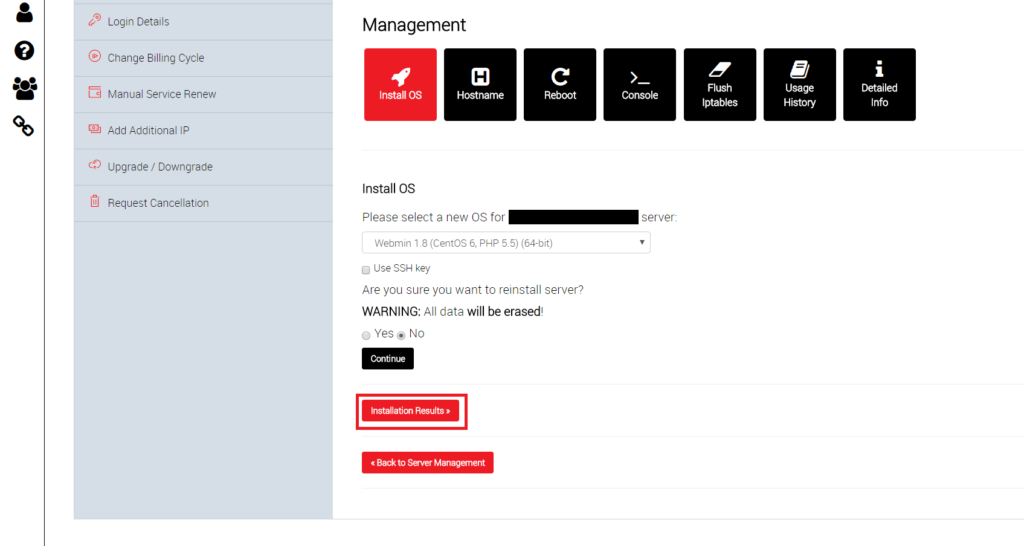
Detailsの画面が表示されるので、[Install OS]を押下しましょう。
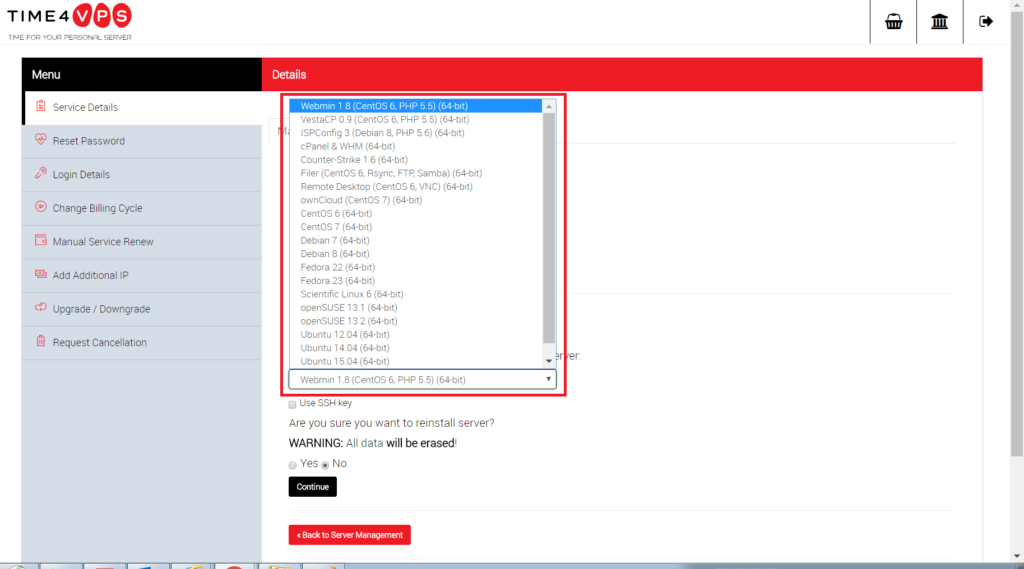
インストールするOSの種類をプルダウンから選択しましょう。

今回はCentOS 7(64bit)を選択しました。
[Are you sure you want to install server?]に対しては[Yes]を選択し、[Continue]を押下して先に進みます。
※上記の選択肢は、既存のシステムが存在している場合にデータを全て消去するけど問題ないか、という確認です。既存システムに対して新しくOSインストールする場合には確認のうえでチェックをしましょう。
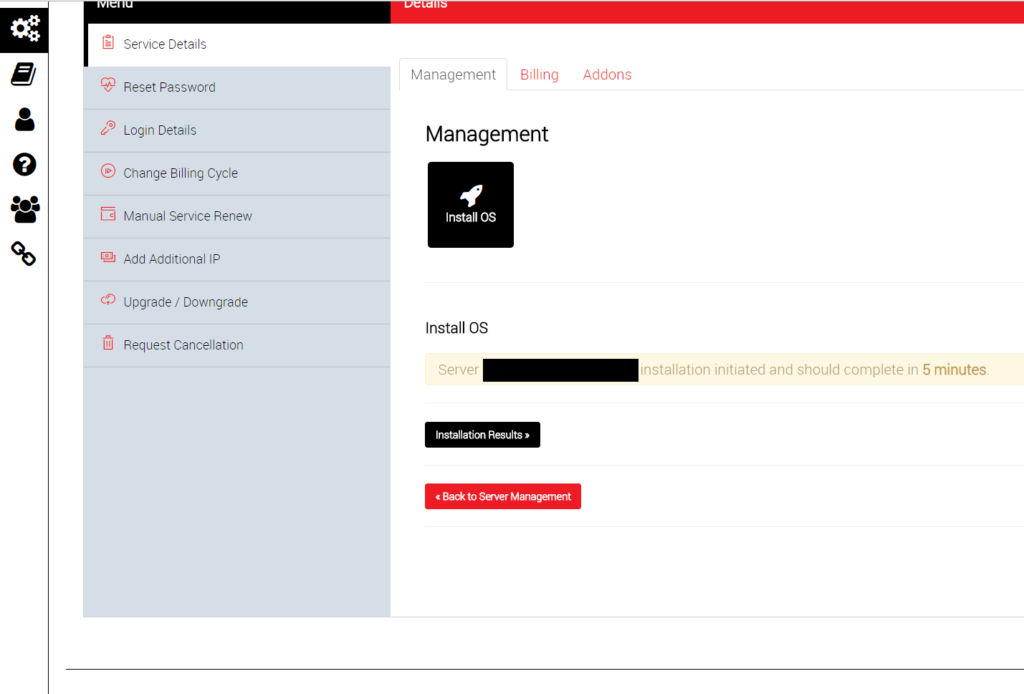
選択したOSでインストールが進行します。
インストールには5分ほどかかるのでしばらく待ってから確認しましょう。

5分後に確認するとインストールされたサーバの状態が確認できます。
インストールの結果は、Managegmentコンソールの[Install OS]から[Instlation Results]から確認可能です。
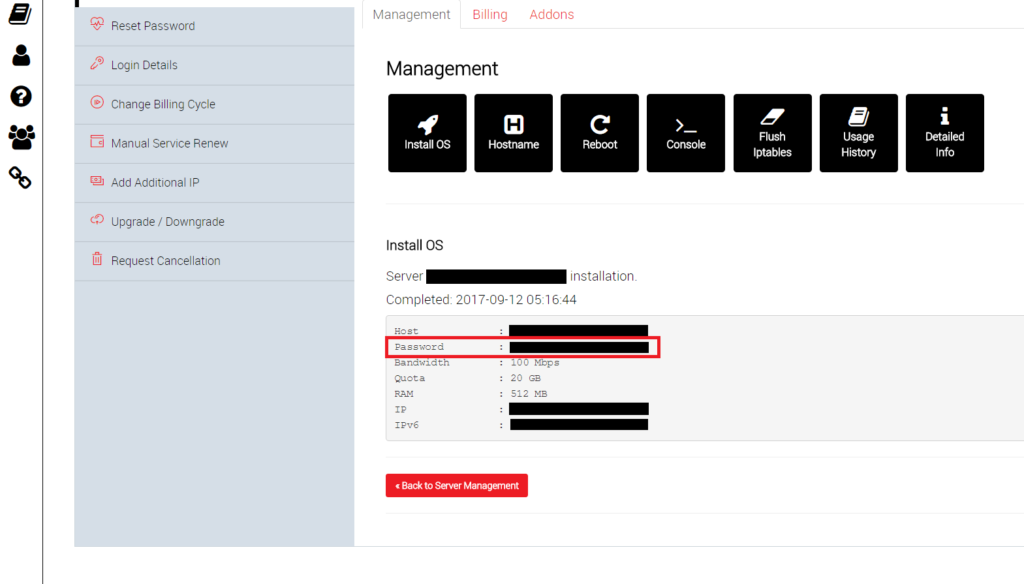
Instlation Resultsの表示例です。rootの初期パスワードが表示されているのでメモしておきましょう。
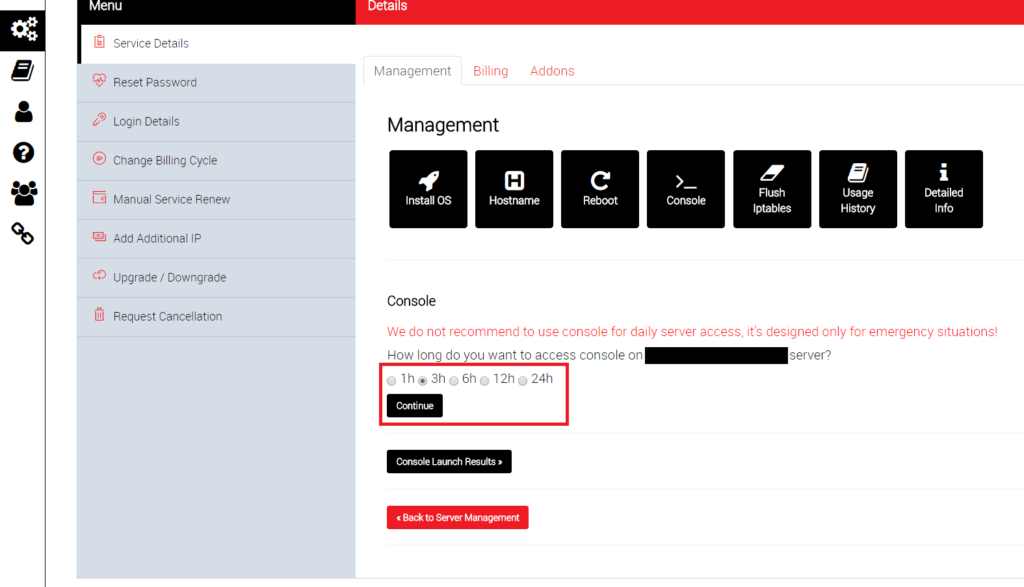
インストールが完了するとWeb上のコンソールからアクセスできるようになります。
Managementコンソールの[Console]をクリックし、[How long do you want to access console on XXXXX server?]
の選択肢でWebコンソールを有効化する時間を選択して[Continue]を押下します。
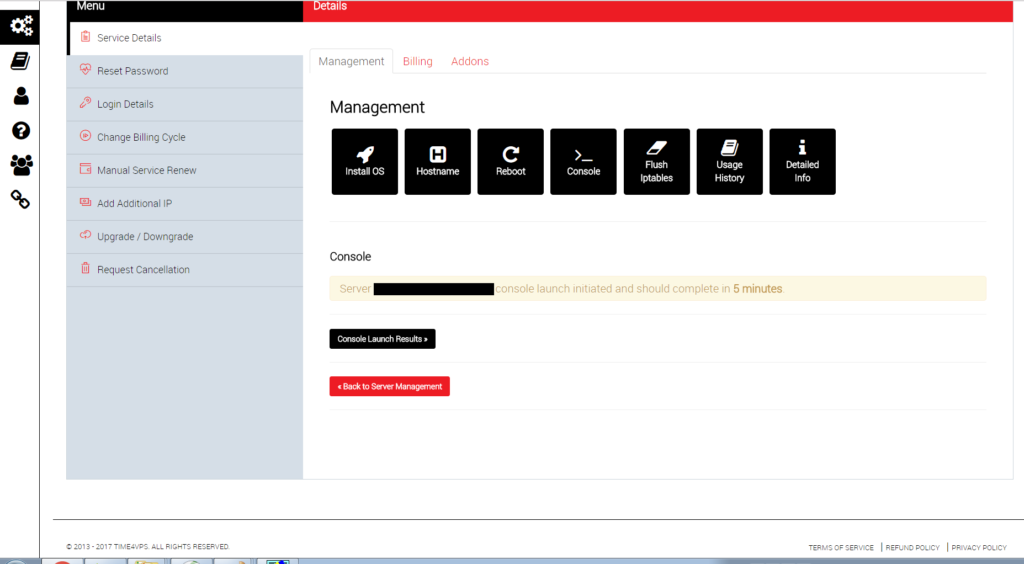
この画面になったらWebコンソールのリクエスト完了。再度、5分ほど待ちます。
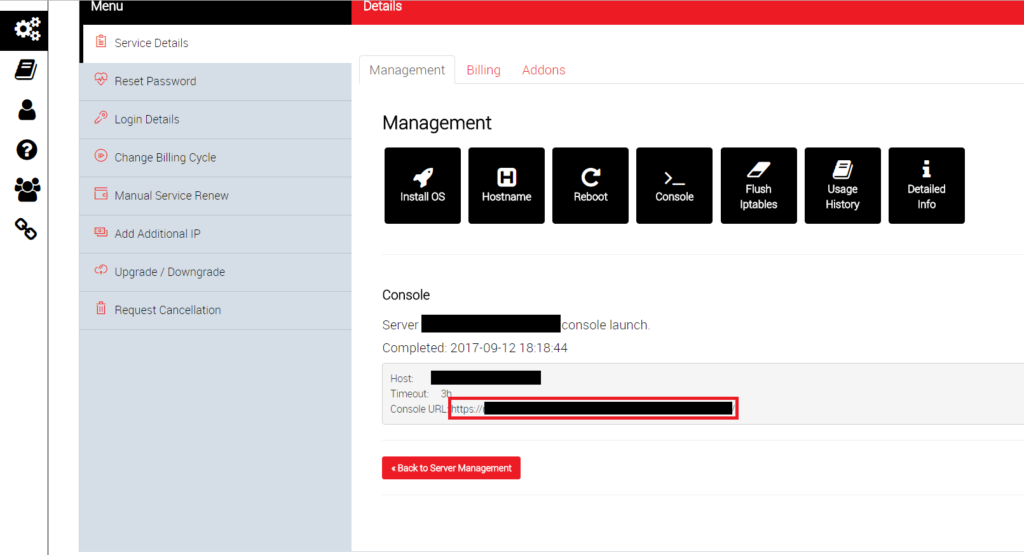
5分後に[Console]タブを開くとWebコンソールへのアクセス用のURLが表示されているので、ブラウザに貼り付けてアクセスすることでWebコンソールを開くことができます。
以上でOSのインストールは完了です。


コメントを残す